Table of Content
To use this command make sure your chromium browser is closed and now open new terminal window and type the command. This command will launch the chromium browser with the CORS security disabled, don’t browse the internet with this disabled. If you have enabled SSH , you can restart the Pi and run the Google Assistant software headless (without the monitor/keyboard/mouse).
Just look for smart devices with a Works with Google Home or Matter badge. Matter devices connect to each other locally over your smart home network using Wi-Fi or Thread, making your devices more responsive, reliable, and secure. With Android Fast Pair for Matter, your phone can automatically detect Matter devices. So setting up new devices and connecting them to your network is easier than ever.
Step 11: PARCEL TRACKING, RSS FEED PLAYBACK and RADIO STREAMING
After logging in to your Google account, you will see following window. First, we have to register and set up a project on theGoogle Console Actions dashboard . Press F4 to change the Mic dB gain and set it as you want. First, make the Pi Bluetooth to auto connect the speaker . Go to the Bluetooth icon on the top menu bar, turn on Bluetooth and then add a Bluetooth device.
It is structured so that a POST request can change the state of the relay. Now all you need is to get your Google Home to deliver a POST request to your device. Eventually, you will want to add some authorization so that strangers can't control your devices, but now we just want the request to work. The first thing that you need to do is set up the wiring so that you can programmatically flip the switch using our Raspberry Pi. While it’s easy to trigger GPIO ports, they can only emit 5V.
Bonus: Voice Activated GPIO
Ian Buckley is a freelance journalist, musician, performer and video producer living in Berlin, Germany. When he's not writing or on stage, he's tinkering with DIY electronics or code in the hope of becoming a mad scientist. Switch back to the SSH terminal, and navigate to /home/pi.
Google Home is a great tool to turn everyday automation and the smart home into speech-triggered workflows. With the power of AI assistants like Google Assistant, the internet of things becomes more responsive and more flexible to our daily fluctuating needs. Extend your mobile app Provide faster ways for users to access your Android app via Assistant. So until Google and Geeni work together and find a solution, affected users will have to resort to the app. We hope developers find out why Geeni devices are not working with Google Home and fix the glitch at the earliest. If you would like to contribute to this guide, or to work with me on building out a starter application, you can also feel free to get in touch!
Step 4: Create Your Server
We are using the neat Saramonic Mini Directional Microphone for Smart Phone. If it didn’t work, clues may be lurking in the ifttt activity log or the Pi /var/log/mini-httpd.log file. You can also try adding lines to the script to log something to a file somewhere. After setting up Internet access and a new Raspbian installation on the Pi, you can move on to set up the audio devices. This project is a good introduction to using Google API services. Now that you have a Google Assistant device, try some of the best Google Home commands---we've looked at some great Google Home mini games.

If you are totally new to Raspberry Pi, be aware that you may need some additional hardware like usb cables or wifi chips in order to get up and running. We're done with the authenticating and adding the apps to your project now. We're going to start downloading the tools to get Google Assistant on your Pi.
Electronics Weekly @ 60!
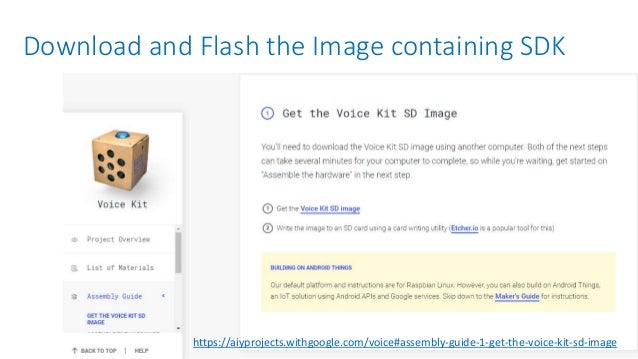
Follow the steps below to set up a Developer Project. To install the Google Assistant SDK, you will need to set up a Google Developer Project. For speakes holes and microphone holes, i use my soldering iron to put holes at the bottom of my enclosure and 2 holes at the top. To feel the real "Google Home" we will be adding custom sounds and led light response. Click on Select Drive and find the drive of your micro sd card reader. At line 66, remove or comment out the print statement, and add an if statement to control the LED.
Select Google Assistant and choose Say a phrase with a text ingredient. Sudo apt-get install mini-httpd sudo nano /etc/default/mini-httpd Now set set the START parameter in there to 1. You’ll also need to route web traffic from a fixed URL to your Pi.
Set up your Nest Wifi and Google Wifi in minutes using the Google Home app. Run speed tests, set up a guest network, and easily share your Wi-Fi password with family and friends. Use parental controls like Wi-Fi pause to manage online time for the kids. Automatically prioritize video conferencing and gaming traffic on all devices, or decide which devices to prioritize for all traffic types. We're excited to announce that Google Nest and Android users can now enjoy your Matter-enabled devices and apps! Plus, the Google Home app on Android can support setup and control with Google.

Make sure to have a look at our previous Instructables to get inspired. But in the last few hours, many Geeni users have reported that their devices are not working with Google Home. The issue is preventing those affected from controlling their devices using voice commands . CGI scripts on a Pi and Google Home interfacing. It just happens that ifttt provides a fairly simple way to combine the two and end up with voice controlled Christmas lights. What’s great about automating with Google Home is that you bring your smart home assistant with you when on the go through your Google assistant enabled smartphone.
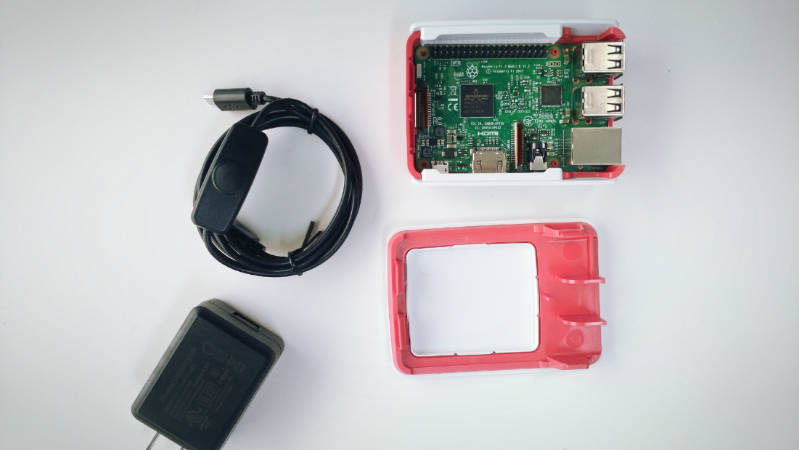
In your PC start an SSH terminal and connect to the Pi. Next step will be installing the wake word engine - snowboy - so you don't need to press enter to activate. On the same terminal, install the Google Assistant SDK and the oauth tools. The last command requires the client secret file generated while preparing Google Project and account. To power up, connect the 5v USB power cable to the power port on the docking hub . You should see the normal Raspbian OS coming up on the monitor.

For example, Autoplay and Stream I got you command will play the requested I Got You and after the end of the track will autoplay susequent tracks. The number of autoplay tracks has been limited to a maximum of 10. This can be changed the under the YouTube_Autoplay function in the actions.py script. Open the service files in the /home/pi/GassistPi/systemd/ directory and add your project and model ids in the indicated places and save the file.
Most Nest smart displays and Wi-Fi devices have a Thread border router built in, so you won’t need a separate hub for adding Thread devices to your smart home. Matter devices work with your Google Home and other Matter-enabled devices, making it easier to build a smart home that helps with any need. Use the activity tab to better understand what’s happening in and around your smart home.


No comments:
Post a Comment